

7 Steps to Properly Use a Soil Stamper
13 November 2023
Are you planning a construction project that involves soil compaction, Sobat Honda? If so, a soil stamper is the best tool to help Sobat Honda achieve a solid and sturdy result. However, before Sobat Honda start, it's essential to understand how to use a soil stamper correctly.
Furthermore, if Sobat Honda wants to achieve the best results, a soil stamper must be used correctly. Sobat Honda will also likely need other auxiliary tools to enhance the performance of the stamper, such as general purpose engines from Honda Power Products.
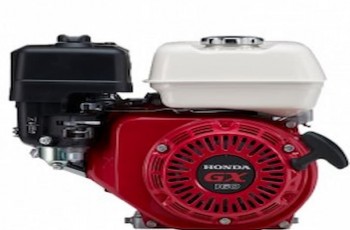
With state-of-the-art technology, Honda Power Products provides general purpose engines with different capacities to meet the community's needs. GX120T2 QD and GX270T2 LH are examples of general purpose engines that Sobat Honda can use.
Certainly, there are many other types that Sobat Honda can use, so visit Honda Power Products and find the right general purpose engines now!
What is a Soil Stamper?
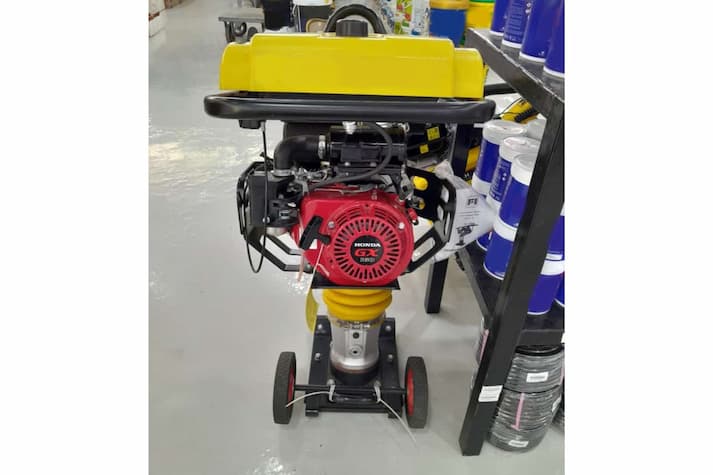
A soil stamper is a construction tool used to compact and compress soil with great pressure. This tool consists of a machine that produces strong vibrations, as well as a metal plate that functions to level the ground surface.
Soil stampers are generally used in various construction projects, such as road construction, building foundations, and other work that requires dense and stable soil.
Read Also: Five Ways To Increase Farming Yields
Functions of a Soil Stamper
Transforming soil into a solid and compact base is an indispensable task in construction. This is where the vital role of a soil stamper comes into play, as it serves as a tool to achieve a strong and stable foundation. However, in addition to leveling the soil, the use of a soil stamper has other functions, which are explained below.
1. Soil Compaction
Compaction is crucial in construction projects because it can transform loose and spaced soil into a solid and sturdy one. The stamper generates strong vibrations that penetrate the soil, reducing the air gaps between soil particles and consolidating them. The end result is denser soil capable of bearing structural loads more effectively.
2. Surface Leveling
In addition to compaction, the soil stamper can level the soil's surface. The metal plate on the stamper starts smoothing the soil when the machine's vibrations are activated. Once the soil surface is level, subsequent construction work can be done more easily and accurately.
3. Preparation of Strong Foundations
The use of a soil stamper also serves the purpose of preparing a strong foundation. A robust foundation is crucial for building durable and stable structures. The stamper helps compact the soil in the foundation area, effectively enabling it to withstand the structural weight.
4. Reducing Soil Settlement Risk
Using a soil stamper also helps significantly reduce the risk of soil settlement or surface subsidence. Loose or porous soil is more susceptible to shifting or settling.
If left unchecked, this can lead to severe damage to structures built on it. By compacting the soil with a soil stamper, the risk of unwanted settlement can be minimized effectively.
5. Increased Construction Efficiency
Furthermore, the use of a soil stamper contributes to improved efficiency in construction projects. It allows for the compaction and leveling of soil to be carried out quickly and effectively.
This saves time and labor that would otherwise be required for manual compaction. With increased efficiency, construction projects can be completed more quickly without compromising quality or structural integrity.
7 Steps to Use a Soil Stamper Properly
Using a soil stamper is not difficult when Sobat Honda has read the instruction manual provided at the time of purchase. The user manual typically contains comprehensive information on operating and troubleshooting simple technical issues.
To make it easier, this time there is also information available on how to use it properly. Read more below!
1. Equipment and Site Preparation
Before starting to use the soil stamper, the first step is to ensure that Sobat Honda has prepared all the necessary equipment. Make sure the stamper is in good condition and ready for use.
Also, ensure that Sobat Honda is using the appropriate safety gear, such as a helmet, gloves, and protective shoes. All of this safety gear is crucial for self-protection during stamper operation, Sobat Honda.
Then select the area to be worked on and make sure the soil is ready to be compacted. This means that the location is clean of stones or other hard materials that could damage the stamper.
2. Adjust the Metal Plate
Next, Sobat Honda must ensure that the stamper's metal plate is securely attached and in the correct position. Make sure the metal plate is level and stable before Sobat Honda starts the machine. Improperly attached or misaligned metal plates can disrupt the compaction process.
3. Start the Engine
After confirming that the metal plate is in the correct position, let's start the soil stamper's engine. Allow the engine to run and generate the strong vibrations necessary for soil compaction. Sobat Honda's grip on the handle of the stamper should be firm to ensure that the stamper operates in the intended direction.
4. Move the Stamper
Once the engine is running, Sobat Honda can start moving the stamper to the area to be worked on. Hold the stamper's handles tightly and ensure Sobat Honda can control its movement effectively. Move the stamper back and forth with even and smooth motions to ensure that compaction is carried out uniformly across the area.
5. Perform Compaction
When performing compaction, it's a good practice to divide it into several levels, Sobat Honda. In the beginning, Sobat Honda can use the lowest vibration setting. If the soil appears to be getting smoother, gradually increase the vibration to ensure there are no air pockets in the soil.
6. Check the Results
Once all the compaction processes are complete, don't leave the site right away. Try to inspect the results thoroughly. Ensure that the soil has been compacted effectively and the surface has been leveled. If necessary, Sobat Honda can perform additional compaction to achieve the desired level of compaction.
7. Maintenance and Storage of the Soil Stamper
The correct use of a soil stamper also involves maintenance and storage. After each use, make sure to provide maintenance and store it as recommended, Sobat Honda. The maintenance and storage steps include:
-
Cleaning: Remove soil residue or other materials from the metal plate after use. Ensure that all components are clean before storing.
-
Lubrication: Check and lubricate moving parts of the stamper according to the user manual's instructions. Proper lubrication helps maintain the optimal performance of the machine.
-
Storage: Store the soil stamper in a dry area that is protected from extreme weather conditions. Avoid direct exposure to sunlight and excessive humidity.
-
Regular Maintenance: Conduct regular maintenance as recommended by the manufacturer. Check the engine, components, and vibration damping system routinely to ensure Sobat Honda can use it for an extended period.
Sobat Honda now has a complete guide on how to use a soil stamper correctly. When these steps are carried out meticulously, Sobat Honda can ensure that the stamper will be a reliable tool for optimal soil compaction.
Read Also: 3 Commonly Used Soil Compaction Tools
However, to maximize the performance of the soil stamper Sobat Honda owns, it's worth considering the use of general purpose engines from Honda Power Products. With a commitment to quality and innovation, Honda Power Products' products will provide the best performance Sobat Honda needs for construction projects.
Don't hesitate to visit Honda Power Products now and find a selection of general purpose engines to meet Sobat Honda's needs!

Honda Power Products Indonesia
Honda Power Products menyediakan mesin serbaguna, generator, pemotong rumput, pemotong sikat, pompa air, dan mesin tempel.Related Posts
6 How Frog Stamper Works and Its Components
Before using it to compact soil, understand the various ways frog stamper works and its components in this article.

The Principles of How Meat Grinders Work
For Sobat Honda, who runs a culinary business and needs a meat grinder, it's essential to know how meat grinders work. Let's explore the wor

How to Operate Modern Rice Milling Machines?
Looking to maximize agricultural productivity and rice harvests? Learn how rice milling machines operate here and use versatile machines from Honda Po

Understanding Various Types of Agricultural Machinery and Their Functions
The use of modern agricultural machinery has significantly improved crop quality. Discover the various types of agricultural machinery Sobat Honda can

Learn the Following Parts of the Sprayer for Agricultural Purposes!
Before using it for agricultural activities, get to know the various parts of the sprayer so that it can be used properly. Check it out here!
Selecting an Engine
Honda GX series engines are legendary. For reliable, easy-starting, fuel efficient performance, insist on a Honda GX Series Engine. And there’s